Spin bikes aren’t the easy-riding recumbent bikes you’re used to in the corner of the cardio section!
Instead of leaning back into a comfortable seat and just moving your legs, spin bikes keep you upright and give you a full body workout.
Designed more like road bikes, your whole body will be at work getting the flywheel to turn and stabilizing your body as you move through seated and standing positions during your workout.
Spinning is a great total-body cardio workout in large part because of the design of spin bikes. Heavy wheels and resistance adjustments keep your heart rate up while you spin.
They’re also built with strong, durable materials, so you can stand on the pedals and bounce up and down off the seat without damaging it (or hurting yourself!). This allows you to work your core, arms, and legs at the same time and burn way more calories than you could on a regular stationary bike.
But because spin bikes require so many adjustments to use them safely and effectively, you’ll have to learn about each of the parts before you get spinning at home or at your first spin class.
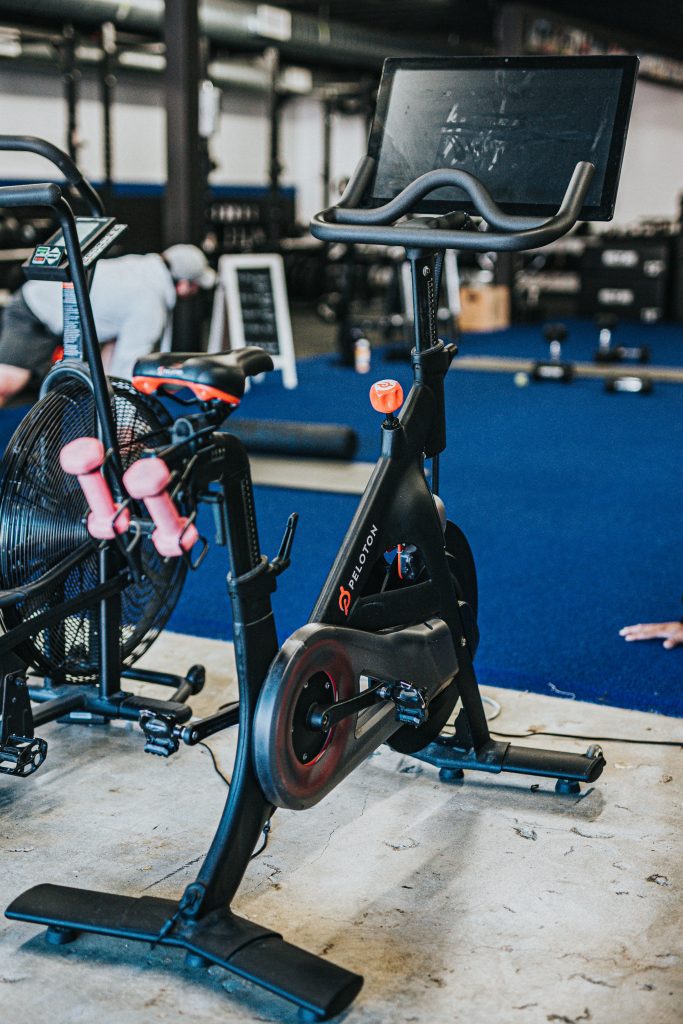
The main parts of a spin bike beginners need to know are:
- The seat/saddle
- The seat post
- The seat slider
- The handlebars
- The pedals/foot clips
- The resistance gears
- The stabilizer bars
- The flywheel
- The chain/belt drive
In this post, I’ll give you an overview of the 9 main parts of spin bikes and give you tips on how to use each one.
Whether you’re looking to buy your own spin bike or just attend your first class, here’s what you need to know to get started.
1. Seat or saddle
Spin bike seats, which are sometimes called saddles, are the same type of seats used on regular outdoor bikes.
Although most saddles are padded, some people may still find them uncomfortable, especially when spinning for long periods of time.
If you have your own spin bike, you can replace the seat with one that you find more comfortable. Any standard bike seat will usually work.
If you’re just taking a spin class and can’t make any major changes to the bike, buying padded biking shorts or getting a gel seat cover may help.
2. Seat post
The seat post is the tall metal rod under the saddle that connects it to the spin bike’s frame.
It’s adjustable, so you can customize the height of the seat to fit your body.
Most bikes have a pin that you’ll need to insert into one of the preset holes depending on how high you want the seat to be, and a knob that you’ll tighten to hold it all in place. Adjusting your seat post is important both for your own safety, and to make sure you target the right muscles during your workout.
According to Karen Maxwell, CycleBar Senior Master Instructor:
“Be sure to latch in the pin and tighten all the way so nothing moves during class. The height of the saddle is the most important one to adjust.
“You want to measure the length of your leg from the floor to the top of your hip and adjust the saddle height to match. This allows for a long pedal stroke to target the glutes and hamstrings during the ride.”
When you get on the bike, you should also check to make sure your knees have a slight bend in them on the downstroke. If you have straight legs on the downstroke, you’ll want to raise the seat height.
3. Seat slider
If you look at your spin bike, you may notice that there’s another metal bar underneath the saddle that runs parallel to it. This is called the seat slider.
Just like the seat post, it’s completely adjustable. But instead of changing the saddle’s height, it moves it closer to or further from the handlebars.
To make sure the seat slider’s settings are right for your body, get on the bike and move one of the pedals to the 3 o’clock position.
If your seat is in a good spot, your knee will be over the ball of your foot. If it’s not, unscrew the knob on the side of the seat slider and move the seat forward or backward until your foot is in the right place.
4. Handlebars
Another thing you may need to adjust before you start your workout is the handlebars. You can change the height and lateral position of the handlebars on most spin bikes.
Since the handlebars are there to help you stabilize, you should adjust these until you feel comfortable.
Most people like to set the handlebar height at the same level as the seat.
If your elbows are bent slightly and your back is straight, that’s a good indicator that your handlebars are in the right place.
As for horizontal positioning, most people feel comfortable when the handlebars are about a forearm’s distance from the saddle.
5. Pedals and foot clips
Your spin bike’s pedals are connected to the flywheel by a belt or chain just like a road bike.
So as long as the flywheel is spinning, the pedals will move too.
If you need to get off the bike and can’t wait for the flywheel to slow down, you can hold down the resistance knob to activate the brake.
Another important thing to know about the pedals is how to clip in. For safety reasons, you’ll need to secure your foot to the pedal to help keep you in place as you move through class. However, how your foot is secured depends on the bike itself.
Many spin bikes have clipless pedals that are similar to the ones on high-end mountain bikes. If you wear a specialized pair of cycling cleats, you’ll be able to attach them directly to the pedal, which will help give you more stability during your ride.
When I spoke to Maxwell, she gave me some tips for clipping in:
“It’s easiest to clip in when you are sitting on the bike and can apply more weight and pressure on the pedal by using your body weight. Match the clip to the ball of the foot first and then press your heel in to hear the ‘clip.’
“To release yourself from the bike, hold down the break (the red knob) and pivot your heel away from the bike like you are squashing a bug.”
However, you may not always need to clip in.
Some spin bikes have adjustable toe cages that you can simply slide your sneakers into, no cleats required.
6. Resistance gears
Most spin bikes have a knob or lever below the handlebars that simulates changing gears on an outdoor bike and allows you to control the resistance.
Lower resistance settings feel similar to cycling on a flat road, while higher resistance settings mimic biking uphill.
Some spin bikes have marked gear numbers that can go all the way up to 16 levels depending on the model. But many knobs are unmarked, which can make it a little harder to know what resistance you’re adjusting to.
If you’re taking a spin class, your instructor will give you directions on how to turn the knob so you can get your settings right.
When I spoke to Maxwell, she said:
“On the CycleBar bikes, we have a red knob placed in the center of the bike, between the knees that you turn to adjust the resistance. We typically cue them to ‘add a touch’ which is just a bit, ‘add a quarter turn’ which is 2 gears or ‘add a 1/2 turn’ which is 4 gears. Turn the knob to the right for more and to the left for less.”
If the resistance that your instructor uses is too challenging for you, it’s okay to set it lower. Adjusting the resistance is more about matching your instructor’s intensity level than using a particular gear number.
If you’re working out at home, figuring out the right resistance settings can be more difficult, especially if you’re not using a preset workout or following a spinning video. But you should strive for intensity, not a specific number.
A common mistake beginners make is thinking that they have to pedal quickly to get a good workout. But cycling too fast won’t help you build endurance and can even put you at risk for injuries.
Generally, you should keep your speed at 110 RPM or lower. If you go any higher than that, you could hurt your joints.
If your pace is too fast or your hips are bouncing up and down in the seat, those are signs that you need to up the resistance and challenge your body more.
On the other hand, if your speed is falling below 60 RPM and the pedals feel impossible to turn, you might need to set your resistance lower until you build more muscle and endurance.
7. Stabilizer bars
Spin bikes have two stabilizer bars with round leveling feet in the front and back. They help prevent the machine from wobbling during intense workouts.
If you’re setting up a bike at home, make sure the leveling feet are flush with the ground. You can usually adjust them by turning them to the right or left.
Some stabilizer bars also have transport wheels attached to make it easier to move your machine. You’ll have to tilt your bike forward to get it on its wheels and roll it.
8. Flywheel
The flywheel is what makes riding a spin bike feel similar to cycling outdoors.
It stores the momentum from your pedaling to ensure a smooth ride with constant resistance that will challenge your muscles.
Flywheels are located at either the front or back of your spin bike and vary in weight. Heavy flywheels provide more resistance and a smoother ride than light flywheels. Cyclists usually prefer them because they recreate the experience of riding outdoors on challenging terrain better.
But it takes a lot of effort to get heavy flywheels spinning, similar to how hard it is to get a road bike up to full speed. So they may not work as well for beginners or people who have joint problems because they can be hard on the knees.
Light flywheels will make it easier to get your workout started and move the machine around, which may be important to you if you’re buying a spin bike for home use.
9. Chain or belt drive
Spin bikes either have a chain or belt drive that’s used to connect the flywheel to the pedals. This enables the flywheel to spin and create resistance when you start pedaling.
Most commercial spin bikes have a chain because they stand up to heavy use better than belt drives. They’re also similar to the drive system on mountain bikes, so they’ll help give you the feeling of cycling outdoors.
But chain drives are noisier than belts and require more maintenance, so they may not be the best choice for home use.
When the chain moves, it rolls over a metal sprocket, which causes a clinking noise similar to what you’d hear when riding a bike outdoors.
You’ll also have to lubricate the chain regularly just like you would on a mountain bike, which can be a messy process.
Belt drives, on the other hand, require practically zero maintenance. They’re usually made of rubber and provide a smooth, silent ride because they run on a relay system similar to a garage door.
Although belts can start to stretch out and slip over time when used in a studio setting, they’re durable enough to last for a long time if you and your family members are the only ones riding the bike.
Wrapping up
Spin bikes have a lot of moving parts, which can be overwhelming to newcomers to the craze.
Know that feeling this way is completely normal for beginners, so if you need help adjusting the handlebars or clipping in, don’t be afraid to ask for it!
Spin classes can also be pretty intense, so remember that you can turn down the resistance or take a break if needed. As your fitness level increases, you’ll start being able to keep up with your instructor or home workout video.
For more, check out:
- What results you can expect from spin class
- My Cyclebar class review
- Tips for your first cycling class
And if you like working out in different ways, learn about the parts of a rowing machine and the parts of a barbell here.
Hope this helps!